Overview
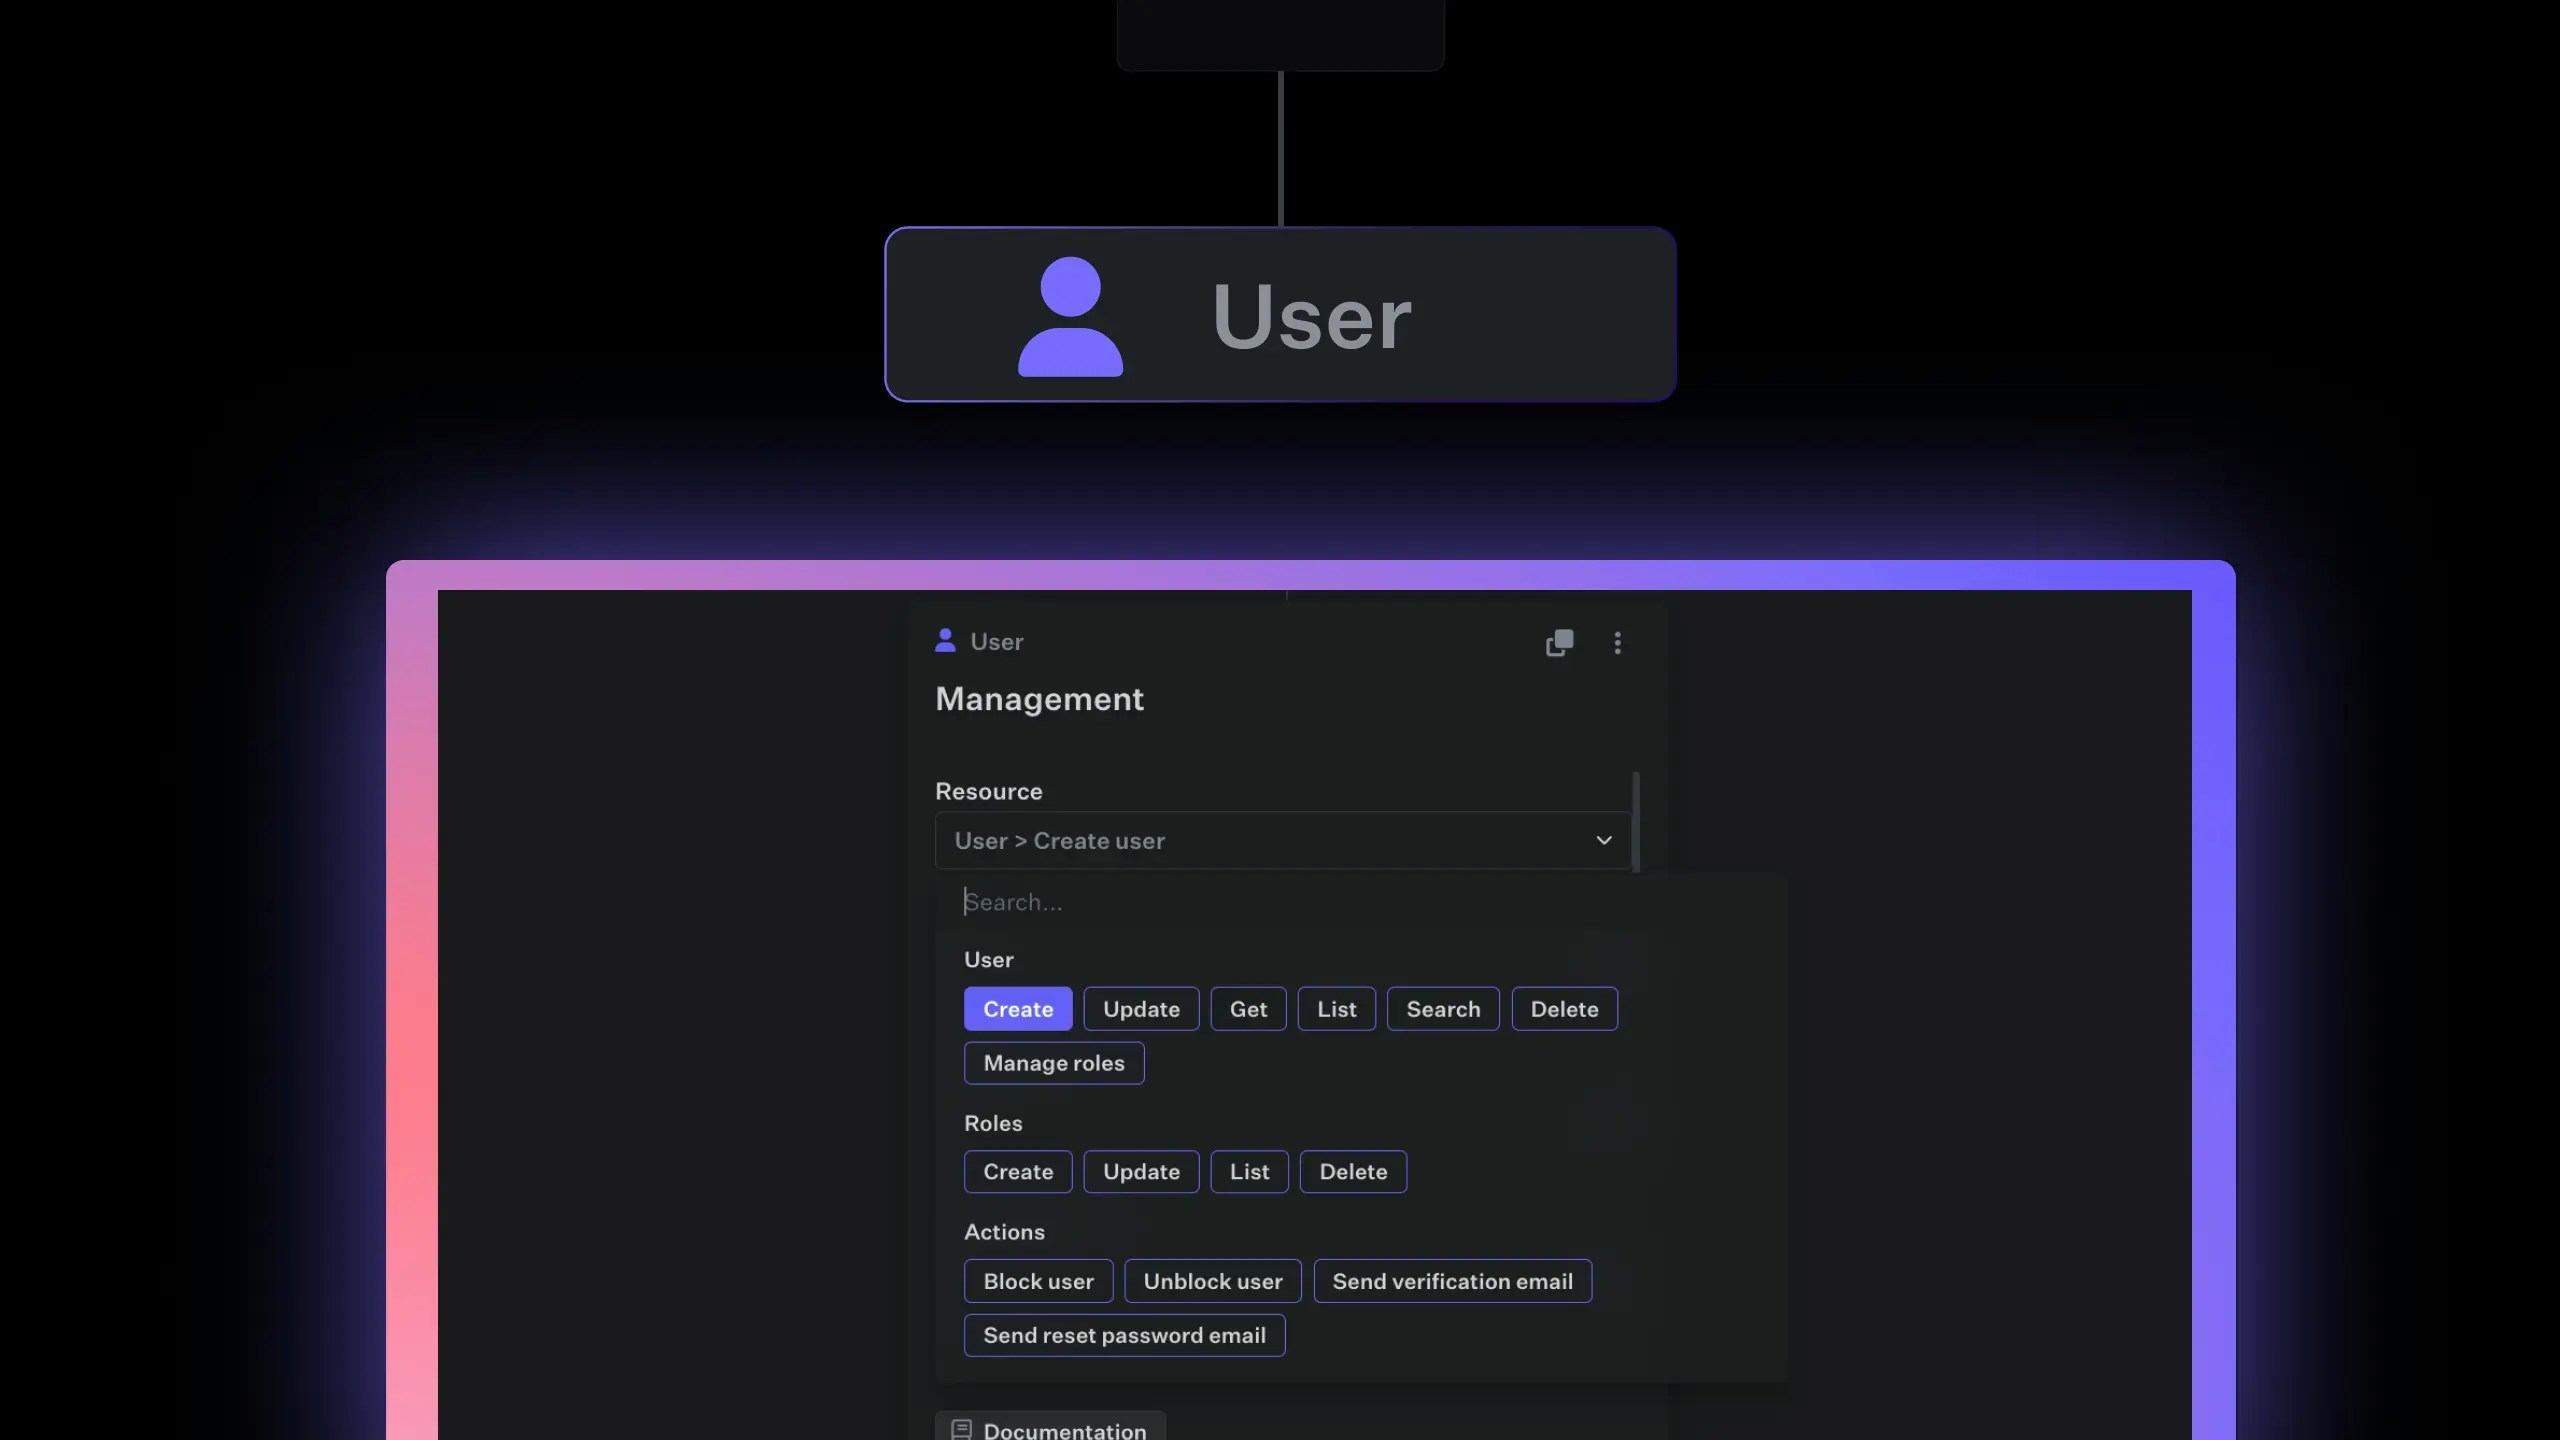
The User actions allows you to manage you user accounts and roles within your project. This functionality covers a wide range of actions including creating, updating, retrieving, listing, searching, and deleting user accounts. It also includes role management and specific actions such as blocking and unblocking accounts, and sending verification or password reset emails.The user action allows you to manage users within the specific context of your workflow or API. To manage global user settings, refer to the User Management Hub.
User Management
Create User
Adds a new user.The user’s email address. This will be used as a primary contact and login identifier.
First name
The user’s first name.
Last name
The user’s last name.
Password
Set the password of the user. Ensure it meets the security requirements:
- has a minimum of 8 characters.
- contains at least one lowercase character
- contains at least one number
Role
Fastgen’s role management allows to customize different access levels. Group users into roles to give them access to different parts of your API or build your own logic on top of it.
Send email verification
Select whether to initiate an email verification process. Set this to true to trigger the workflow
Email Verification request or false to skip this step.Update User
Modify an existing user’s profile by specifying their unique identifier and the fields you want to update.Choose the unique identifier to locate the user. Options include:
- Email: Use the user’s email address as the identifier.
- User ID: Use the unique user ID assigned by your system.
- Current User’s ID: Retrieves the ID of the currently authenticated user from the access token provided in the request.
Email
Change the user’s email address.
First name
Update the user’s first name if necessary.
Last name
Update the user’s last name if necessary.
Verification status
Set this field to update the user’s email verification status.
Get User
Retrieve detailed information about a specific user by using one of the following unique identifiers:- Email: Use the user’s email address to fetch their profile.
- User ID: Employ the user’s unique ID assigned during registration for a direct query.
- Current User’s ID: Retrieves the ID of the currently authenticated user from the access token provided in the request.
List Users
Retrieve a list of all users in your project, with enhanced filtering and pagination options.Roles
Filter users based on their assigned roles. This allows for segmented views, such as administrators, editors, or viewers.
Auth method
Filter based on the authentication methods used by users, such as password, social media logins, or multi-factor authentication.
Email confirmation status
Filter users depending on whether their email addresses have been verified.
Status
Filter by the current status of users, with options including Active, Inactive, or Blocked.
Set a limit to the number of user profiles displayed per page, helping manage large sets of data efficiently.
Navigate through user listings by specifying page numbers, facilitating access to a specific segment of user data.
Search Users
Search for users within your application using specific criteria to quickly locate individual profiles or groups of users.Choose the identifier based on which you want to conduct the search. Options include:
- First Name: Search by the user’s first name.
- Last Name: Search by the user’s last name.
- Email: Search using the user’s email address.
- All: Search across all available fields for a comprehensive query.
Delete User
Permanently remove a user from your project by specifying their unique identifier. This action is irreversible and should be used with caution to ensure that deletion aligns with your data retention policies and user management practices.Choose the unique identifier to locate the user. Options include:
- Email: Use the user’s email address as the identifier.
- User ID: Use the unique user ID assigned by your system.
- Current User’s ID: Retrieves the ID of the currently authenticated user from the access token provided in the request.
Manage Roles
Configure user roles to precisely control access levels and permissions within your project. This functionality supports adding, removing, or modifying roles associated with a user profile, thereby customizing their access and responsibilities.Choose the unique identifier to locate the user. Options include:
- Email: Use the user’s email address as the identifier.
- User ID: Use the unique user ID assigned by your system.
- Current User’s ID: Retrieves the ID of the currently authenticated user from the access token provided in the request.
Choose the method of role management:
- Add: Assign new roles to the user.
- Overwrite: Replace all existing roles with new ones, effectively resetting the user’s role configuration.
- Remove: Remove specific roles from the user, limiting their permissions and access within the project.
Specify the roles to be added, overwritten, or removed.
Role Management
Create Role
Create a new role within your project with a role name and an optional description.Specify the name of the new role. Choose a name that clearly represents the role’s functions and responsibilities.
Description
Provide a brief description of what the role entails and the permissions associated with it. This helps in understanding the role’s purpose within the project.
Update Role
Update an existing role’s details, including its name and description.Specify the name of the role you wish to update.
Enter a new name for the role.
Description
Update the description to better define the role’s functions and associated permissions.
List Roles
Receive a list of all roles defined within your project.Delete Role
Delete a role from your project.Specify the name of the role you wish to delete.
User Actions
Block User
Block a user, preventing them from accessing your project.Choose the unique identifier to locate the user. Options include:
- Email: Use the user’s email address as the identifier.
- User ID: Use the unique user ID assigned by your system.
- Current User’s ID: Retrieves the ID of the currently authenticated user from the access token provided in the request.
Unblock User
Unblock a previously blocked user, restoring their access to your project.Choose the unique identifier to locate the user. Options include:
- Email: Use the user’s email address as the identifier.
- User ID: Use the unique user ID assigned by your system.
- Current User’s ID: Retrieves the ID of the currently authenticated user from the access token provided in the request.
Send Verification Email
Trigger the workflowEmail Verification request.
Choose the unique identifier to locate the user. Options include:
- Email: Use the user’s email address as the identifier.
- User ID: Use the unique user ID assigned by your system.
- Current User’s ID: Retrieves the ID of the currently authenticated user from the access token provided in the request.
Send Reset Password Email
Trigger the workflowPassword reset request, allowing them to reset their password.
Choose the unique identifier to locate the user. Options include:
- Email: Use the user’s email address as the identifier.
- User ID: Use the unique user ID assigned by your system.
- Current User’s ID: Retrieves the ID of the currently authenticated user from the access token provided in the request.